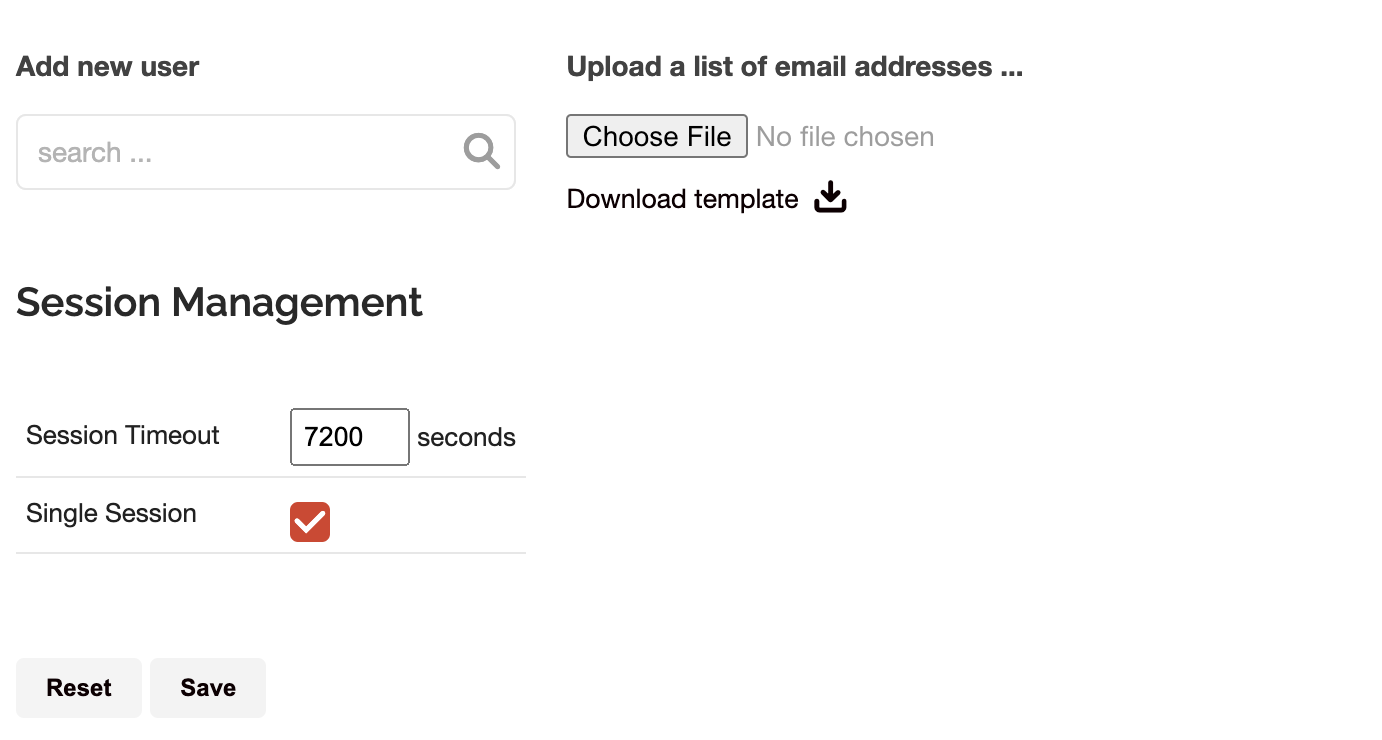
Go to 'Admin Settings' / 'Access Control' and you can do the following:
- Add permissions
- Remove permissions
- Update permissions
Allow everyone access
By default, the 'Everyone' option is selected and every user can access SWOOP. However, this can be changed so only listed people can access SWOOP.
As an Admin you will see an 'Admin' link on the bottom left fly-out menu of SWOOP. This is where you can change the permissions covered in this article.
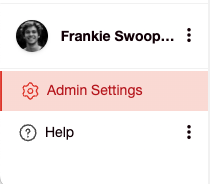
Go to the Access Control option in the Admin dashboard. Here, you can do the following:
- Add permissions
- Remove permissions
- Update permissions
Allow everyone access
By default, the 'Everyone' option is selected and every user can access SWOOP. Additional permissions is provided in the table below to Lite Admins, Advanced Users or Full SWOOP Admins. In the example below Frankie is a Full SWOOP Admin, Rose has been given some additional permissions (Lite Admin), Jaylon is an Advanced User, and everyone else will have normal permissions.
For more information about these roles see further below.
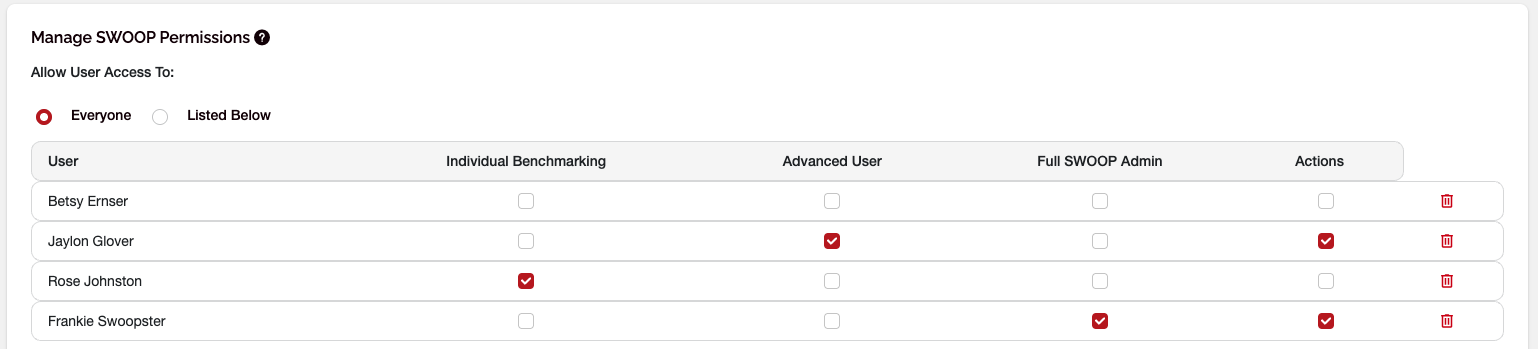
Note: If you have more than 1000 users, the table below will not be shown. In this case, you can modify user permissions by uploading a spreadsheet with user email addresses and their permissions, a template is provided.
This is done by selecting: "Upload a list of email addresses..."
Change permissions
You can add or remove people as SWOOP admins.
Note: If you have more than 1000 users, the table below will not be shown. In this case, you can modify user permissions by uploading a spreadsheet with user email addresses and their permissions, a template is provided.
This is done by selecting: "Upload a list of email addresses..."
Permissions and roles
SWOOP operates with 3 different roles:
- Normal User
- Light Admin
- Full Admin
In this article we'll outline what each of these roles can do.
Bootstrapping Permissions
To become an administrator to perform this function in the first place, you have two options:
- Please raise a support ticket at https://support.swoopanalytics.com/hc/en-us/requests/new.
- Logging in with a user with one of the roles in the table below.
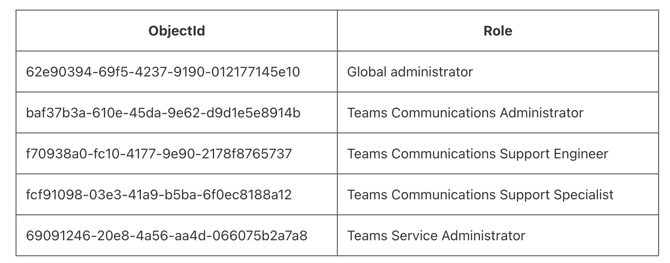
Tables can't be imported directly. Please insert an image of your table which can be found here.
Normal User
A Normal User can:
- Access the SWOOP dashboard available at https://[organization].swoopanalytics.com.
- Access their own Personal dashboard and see personal insights.
- Access the Segment dashboard. Search and access insights for any segment. Only see insights for data (e.g. messages) that the person already has access to.
- Compare segments.
- Access the Enterprise dashboard. Access insights for any segment. Only see insights for data (e.g. messages) that the person already has access to.
Light Admin
A Light Admin is someone who has been given access to some additional features in SWOOP by a Full SWOOP admin. These additional features include one, or more, of the following:
- Create a comparison of individuals on the Personal dashboard, and access the 'Individual Benchmarking' list on the Community, Topic and Segment dashboards.
Full Admin
In addition to what a Light Admin can do, a Full Admin also has the ability to change a variety of other options which are available via the 'Admin' link. Only Full Admins will see the 'Admin' link, and when opened it provides the following features:

- Usage Statistics: See how many people have accessed SWOOP.
- Application Settings: Set default attribute used by Segment Activity. Also ability to determine which attributes are available for normal users (including Lite Admins) versus Full Admins.
- Access Control: Enable selected features for Lite Admins and/or add a Full Admin.
- Theme Settings: Change logo and footer.
- Report/Dashboard Settings: Enable, hide or remove each dashboard and/or report.
- Miner: Enable data mining, access data mining log detail, and upload user attribute data.
- Data export:
- Export list of people plus list of all activities.
Adding or Changing Permissions
Only a 'Full Admin' can add users and/or change permissions. You can also add a larger number of users by uploading a list of email addresses (the template includes detailed instructions), and set the session timeout.